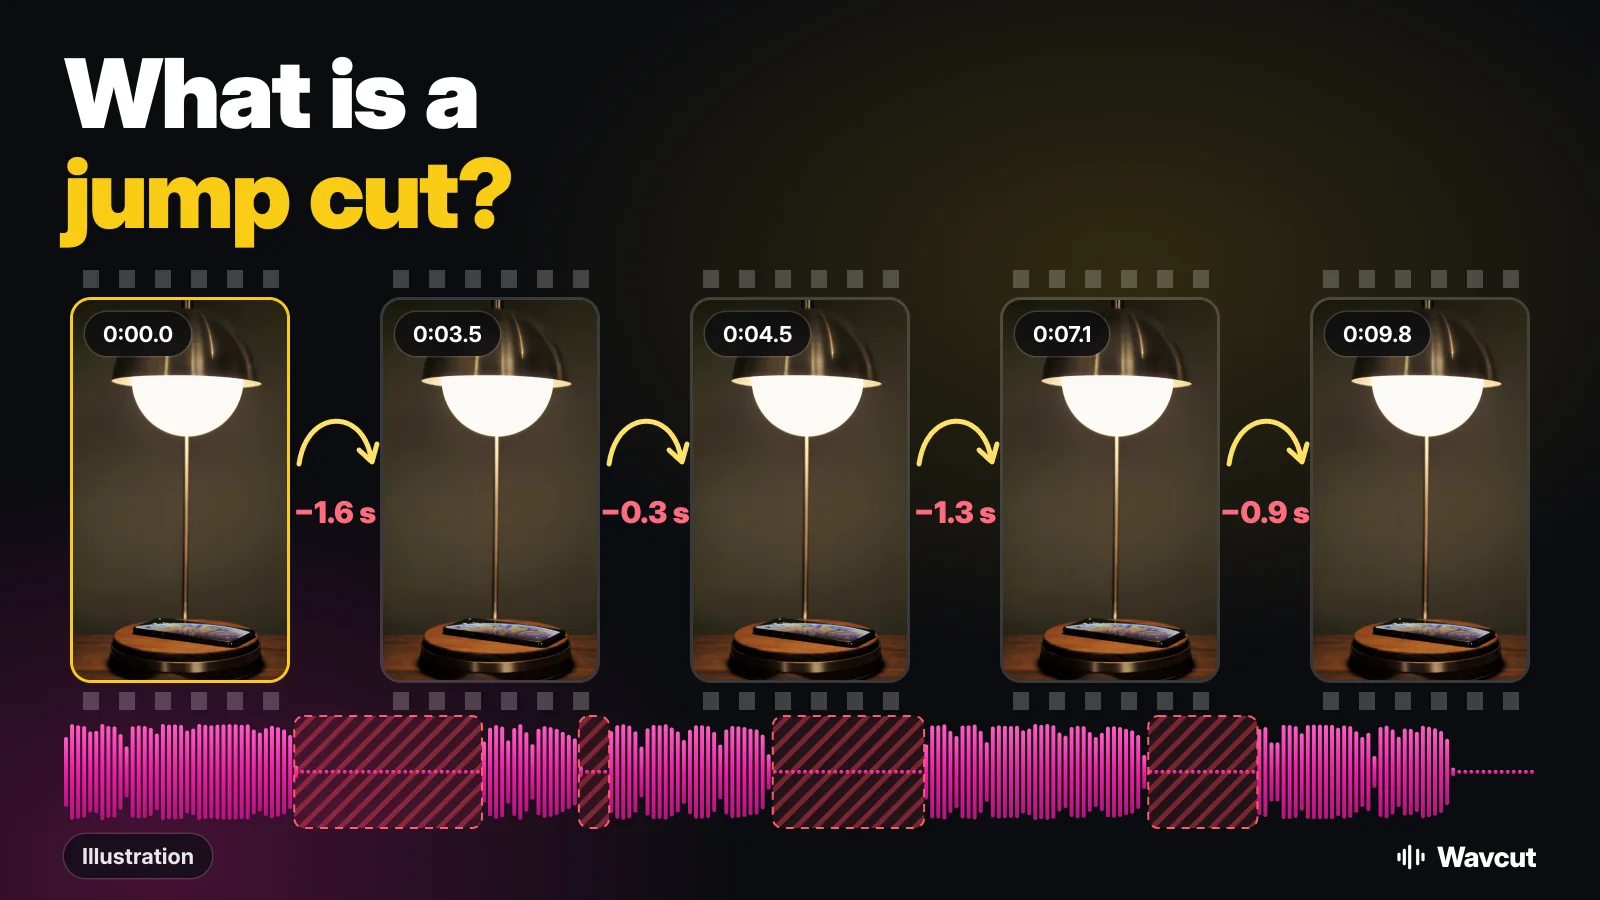
A jump cut is a cut inside one continuous shot: a piece of the middle is taken out, the camera has not moved, and the subject seems to jump forward in time. You have seen thousands of them. Every time a creator on YouTube or TikTok goes from one sentence straight into the next with their head slightly shifted, that is a jump cut where a pause used to be.
What is a jump cut in video editing?
Wikipedia puts it this way: a jump cut "breaks a single continuous sequential shot of a subject into two parts, with a piece of footage removed to create the effect of jumping forward in time." Two things make it a jump cut and not an ordinary cut. The shot is the same before and after, and so is the framing. Only time is missing, which is why the eye notices the join.
Where did the jump cut come from?
Wikipedia names Percy Stow's 1908 film The Tempest as an early example. The cut became famous with Jean-Luc Godard's Breathless (1960), which used jump cuts throughout and popularized them in the 1960s, at a time when most editors worked hard to hide every cut. Decades later, online video adopted the technique: Wikipedia credits the show with zefrank with popularizing it in vlogs. Today it is simply how talking-head videos are edited.
How is a jump cut different from other cuts?
| Cut | What changes | What the viewer sees |
|---|---|---|
| Standard cut | The shot: new angle, new size or new subject | A change of view that usually goes unnoticed |
| Jump cut | Only time; same shot, same framing | The subject jumps from one position to the next |
| Cutaway (b-roll) | The picture moves to other footage while the sound runs on | What is being talked about; any jump underneath is hidden |
Why do YouTubers and TikTokers use jump cuts?
Because pauses are dead time on a phone screen. A talking-head take is full of breaths, restarts and gaps between sentences, and cutting them out is the quickest way to make a video tighter without re-recording it. Each removed pause leaves one jump cut behind.
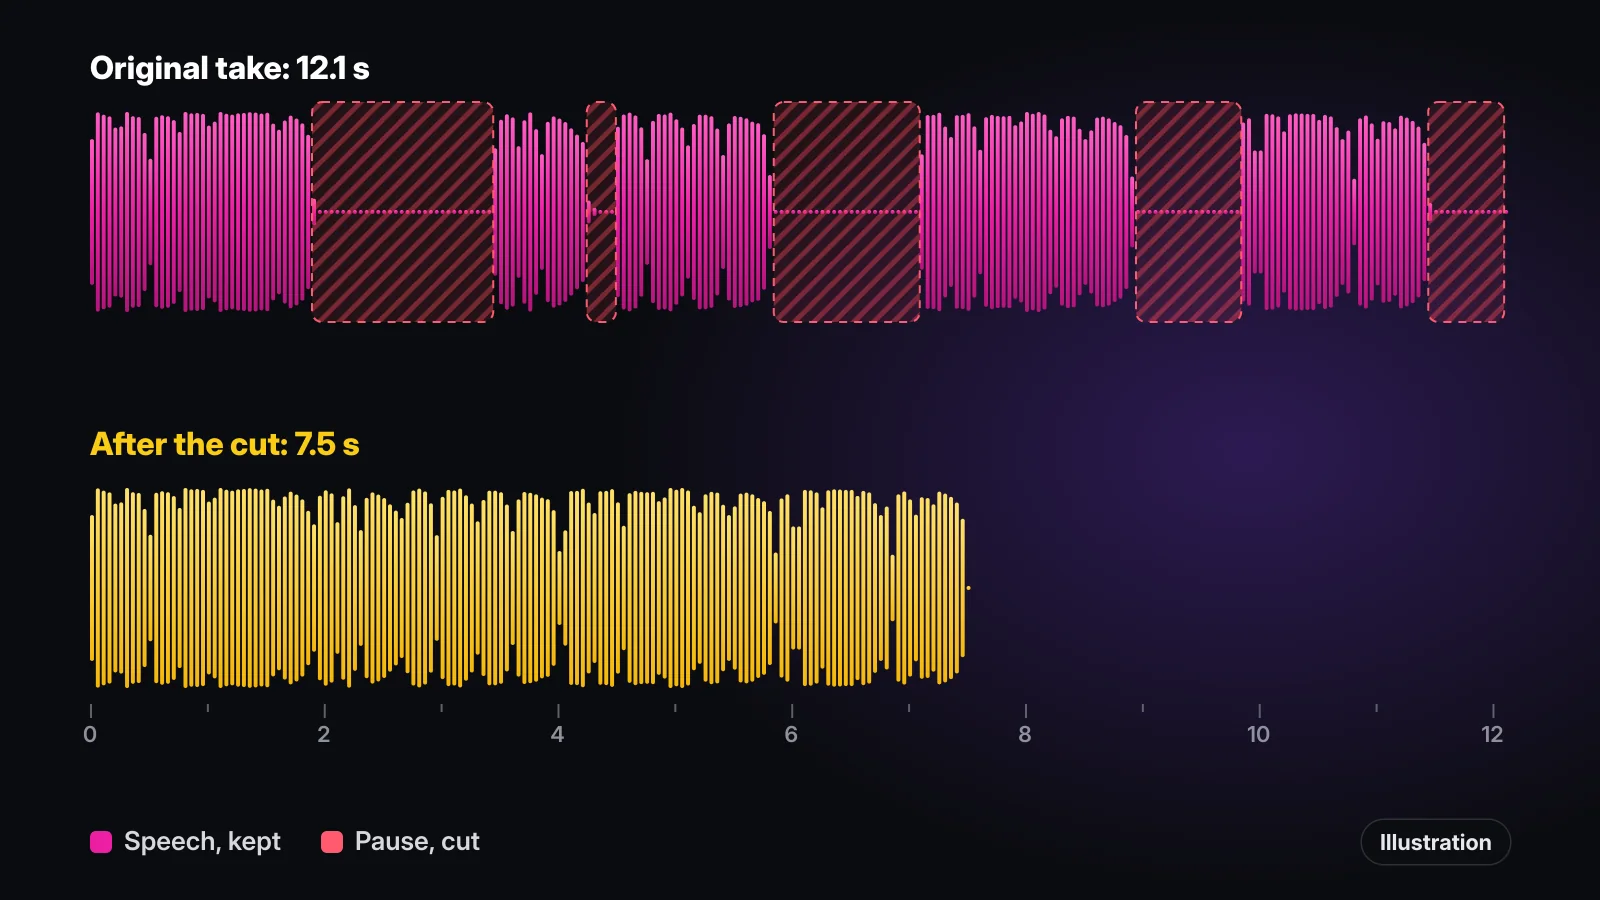
Here is what that looks like on a real take. We measured the 12.1-second sample voice-over from our App Store preview. Between its sentences there are four pauses: 1.6, 0.3, 1.3 and 0.9 seconds, plus 0.65 seconds of quiet after the last word. Cut all of them and the take runs 7.5 seconds, with four jump cuts in it, one at each place a pause used to be. The picture at the top of this page shows those four joins.
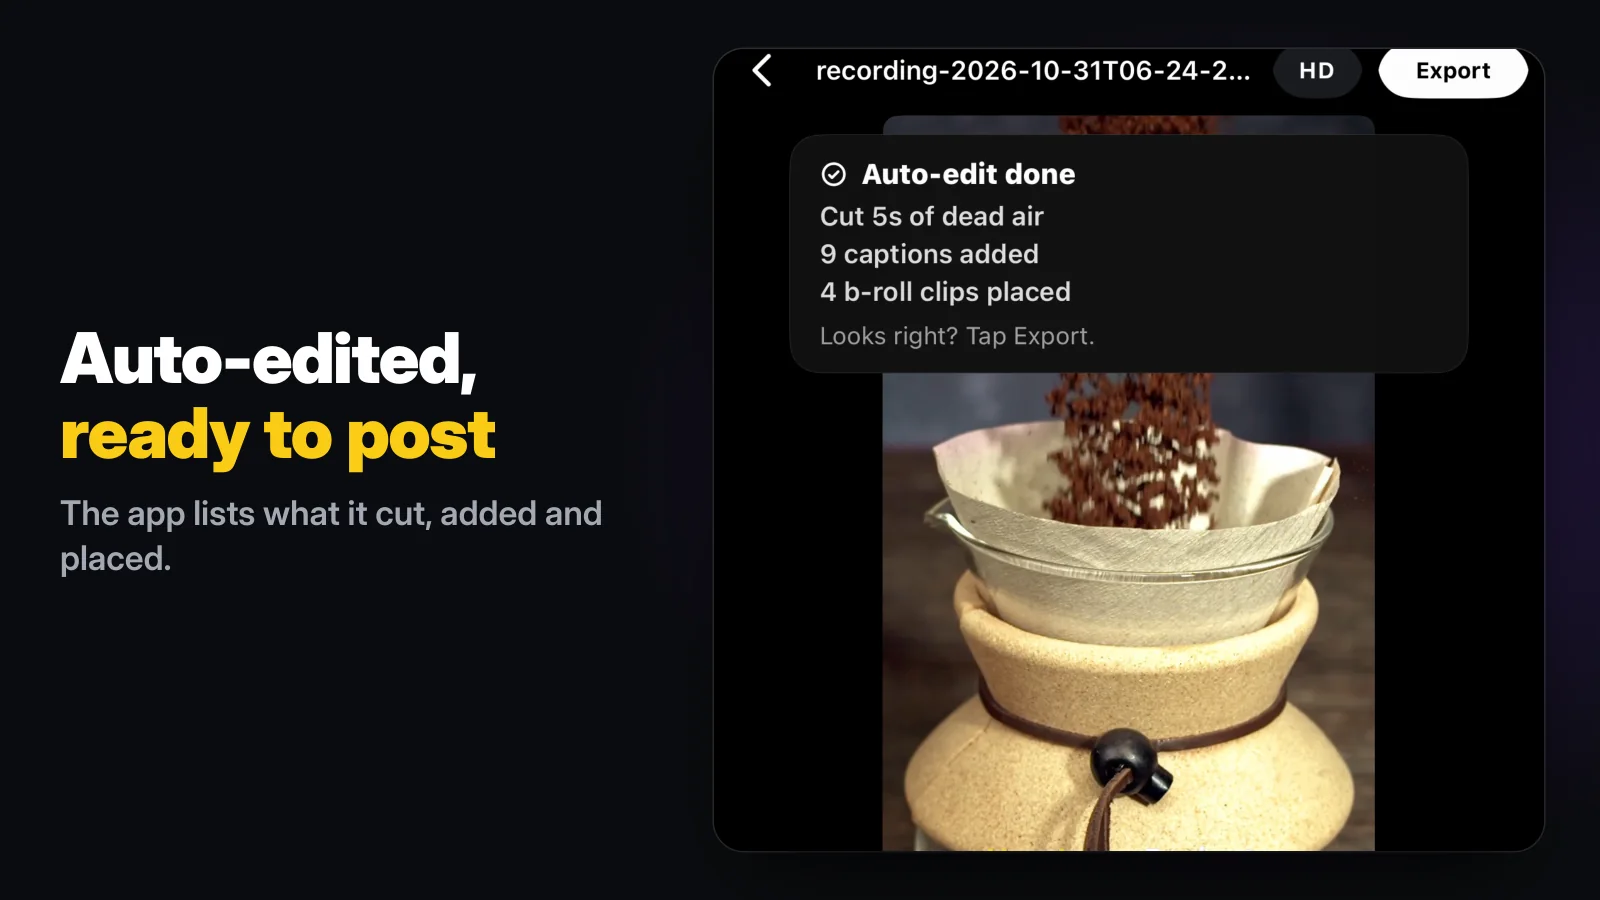
Wavcut measures loudness with its own threshold, so its count is a little different from our drawing. On this take it reported 5 seconds of dead air cut:
Are jump cuts bad editing?
In classic film editing, yes. Continuity editing tries to make cuts invisible, and one of its rules, the 30-degree rule, says the camera should move at least 30 degrees between two shots of the same subject so the cut does not jump. Short-form video works by different habits. Viewers of Reels and Shorts expect jump cuts and read them as pace.
What still looks wrong is a jump that seems accidental: a cut in the middle of a word, a sudden change in the light, or a cut so short the head barely moves and it looks like a glitch. Cut at the end of a sentence, keep the light steady while you record, and the jumps read as style.
How do you hide a jump cut?
- Cover it with b-roll. Show what you are talking about for a moment while your voice runs on. Our guide what is b-roll explains how.
- Change the framing. If you record in parts, move the camera or the shot size between them, in the spirit of the 30-degree rule.
- Put text on screen. Captions give the eye something that continues across the cut. See our auto captions page.
How do you make a jump cut on iPhone with iMovie?
iMovie is free and has no jump cut button, but splitting and deleting does the same thing. Apple's steps for splitting a clip, plus a second split and a delete:
- Open your movie project and scroll the timeline so the playhead sits where the part you want to remove starts.
- Tap the clip, tap the Actions button, then tap Split.
- Scroll to where that part ends and split again the same way.
- Tap the piece in the middle, then tap Delete.
Repeat that for every pause: two splits and a delete each time. Our guide to editing a video on iPhone covers the rest of iMovie's trimming tools.
Can jump cuts be made automatically?
Yes. Wavcut finds the silences in your clip on the iPhone and cuts them in one pass, so every pause becomes a jump cut without a single split by hand. Each cut stays toggleable on the timeline, so a pause you want to keep for effect is one tap away. Your preset can also place b-roll from your own collections over the result, which hides some of the joins. Our step-by-step guide to removing silence on iPhone goes through it.
Checked against Apple's support page on November 10, 2026. Wavcut is our app; its column comes from the product, limits included.
| Job | iMovie | Wavcut |
|---|---|---|
| One jump cut | Split, split again, Delete | Made by the silence pass |
| Every pause in a take | Repeat the steps for each pause | One pass, on the iPhone |
| Keep one pause after all | Undo, or redo that part by hand | Turn that cut off on the timeline |
| Cover the joins with b-roll | Add each cutaway by hand | Placed from your collections by the preset |
| Price | Free | Free to start; Free exports above 720p carry a watermark |
The limits, so you can decide before you install: Wavcut is iPhone-only for now and has no speed control. On Free, 720p exports are clean; higher resolutions carry a watermark until you upgrade. If you are comparing editors, our Wavcut vs CapCut comparison goes feature by feature.