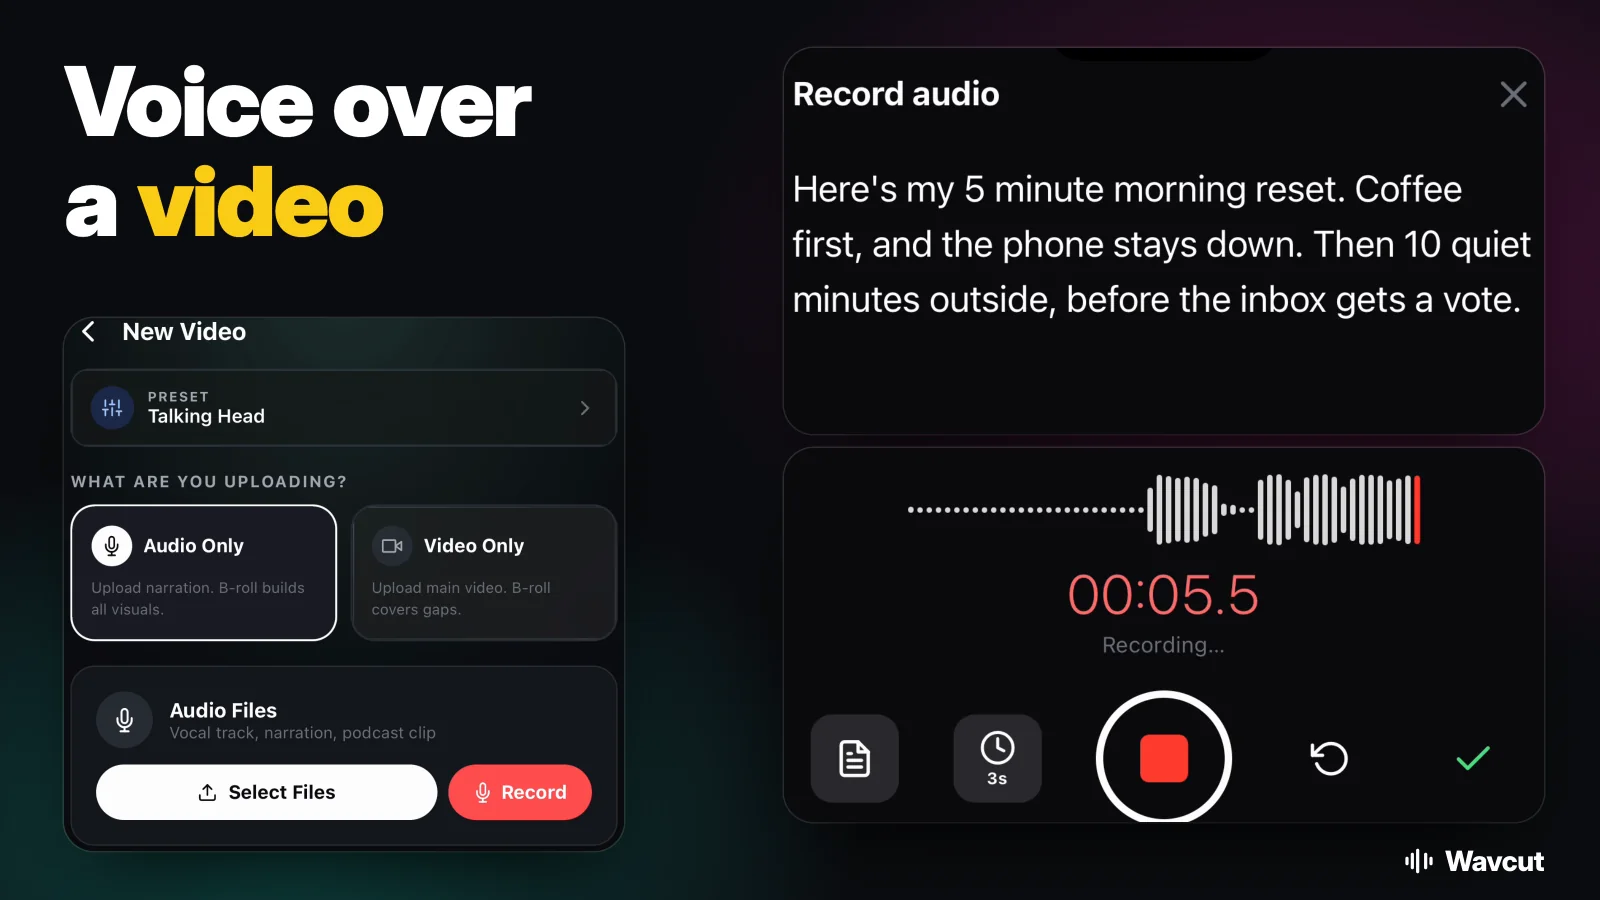
To voice over a video on iPhone you need one of two things: a clip you want to talk over, or just your voice and a plan for the pictures. Apple's free iMovie handles the first case well. The second, where the narration comes first and the visuals follow, is how faceless Reels and Shorts get made, and that is the job Wavcut was built for. This guide covers both, with Apple's own button names so you can follow along on the phone.
How do you voice over a video on iPhone with iMovie?
iMovie records narration straight into a movie project. Apple lists these steps:
- Open a movie project in iMovie.
- Scroll the timeline so the playhead (the white vertical line) sits where the recording should begin.
- Tap the Add Media button, tap Voiceover, then allow iMovie to use the microphone if it asks.
- Tap Record. Recording starts after a 3-second countdown.
- Tap Stop when you are done.
Then pick one of four buttons. Review plays the take back, Retake restarts the countdown for a new one, Cancel throws it away, and Accept adds it to the project. Accepted recordings show up as purple clips in the timeline and can be edited like any other audio clip. iMovie also keeps them in the media browser under Audio > My Music > Recordings, so a good take can go into another project later.
Record in short sections rather than one long take. Then a sentence you trip over means redoing that section, not the whole script.
How do I stop the original sound from drowning out my voice?
If the clip you are narrating over has its own audio, turn it down. In iMovie, tap the video clip in the timeline to open the inspector, tap the Audio button, and drag the volume slider to the left. To silence it completely, tap the Mute button next to the slider; a mute icon then appears in the clip's upper-left corner.
Can you add a voice-over in the iPhone Photos app?
No. Apple's guide to editing video in Photos covers trimming, playback speed and Audio Mix, and has no step for recording narration over a clip. Photos is still the quickest place to trim the clip before you bring it into an editor; our guide to editing a video on iPhone walks through that part.
How do I make a video from just a voice-over?
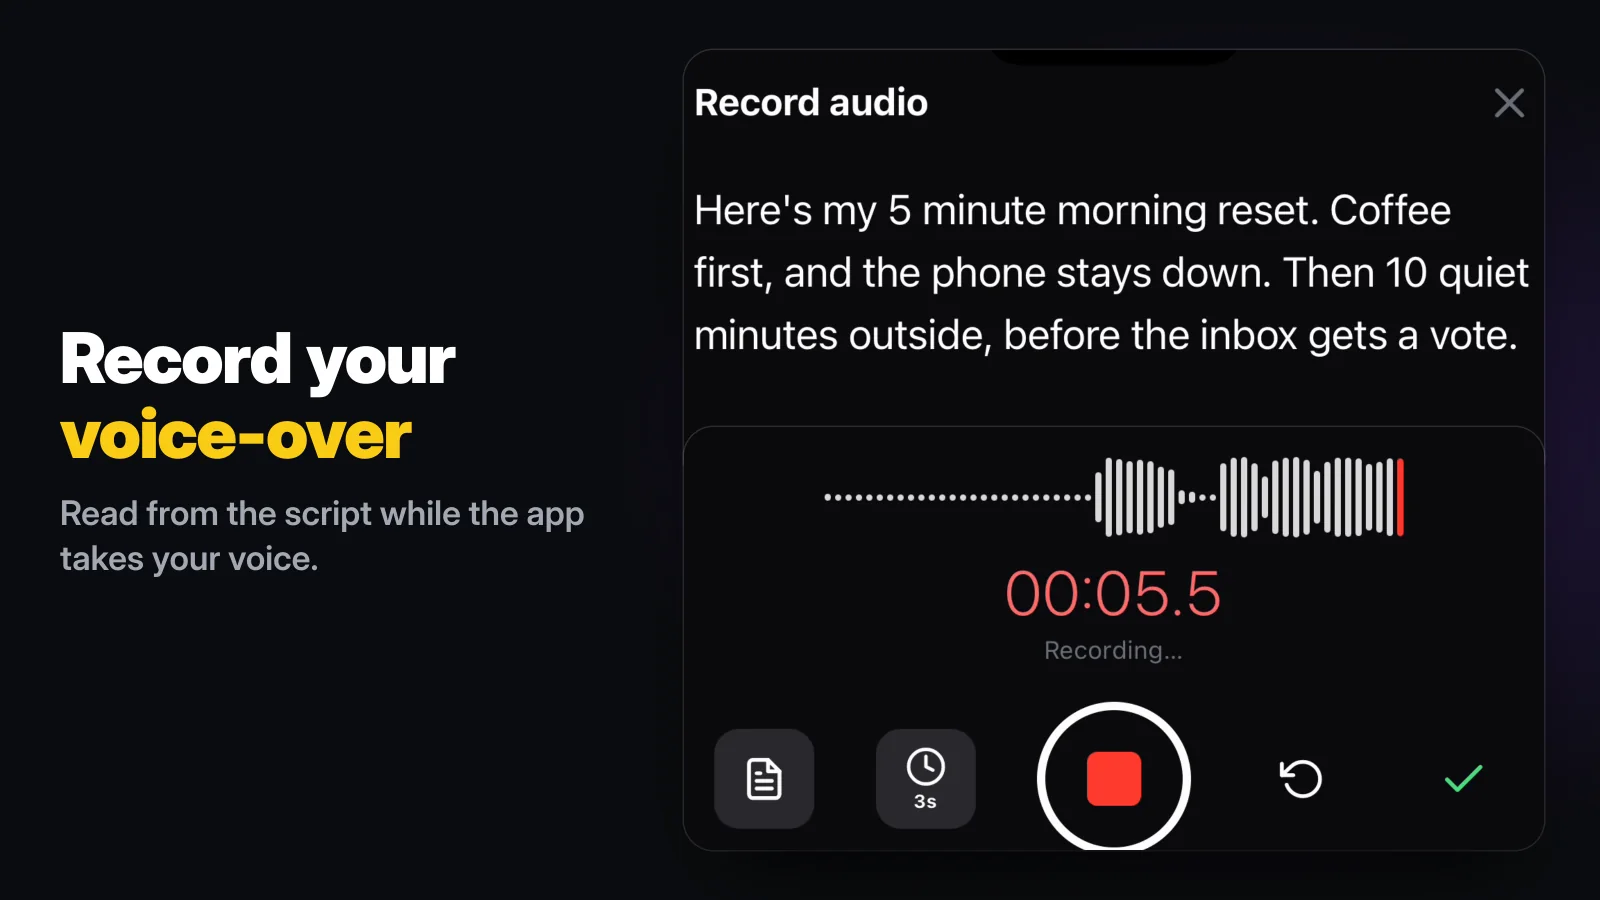
Start from the voice instead of the footage. In Wavcut, tap New Video and choose Audio Only. You can record right there, reading from a script you type into the recorder, or select an audio file you already have: a vocal track, narration or a podcast clip.
Wavcut then transcribes the narration, cuts the dead air, and fills the whole visual track with b-roll from collections you built once, timed to what you are saying. Captions come from the same transcript. Everything lands on a normal timeline, so you can swap a clip, drag a cutaway or restyle a caption before you export. Our guide to faceless YouTube editors goes deeper on building the b-roll library.
iMovie vs Wavcut for voice-overs: which one fits?
Checked against Apple's support pages and the App Store on November 6, 2026. Wavcut is our app; its column comes from the product itself, limits included.
| Job | iMovie | Wavcut |
|---|---|---|
| Record narration in the app | Yes, at the playhead, after a 3-second countdown | Yes, in Audio Only, or add a voice-over in the editor |
| Use an audio file you already have | Yes, from the media browser | Yes, select audio files in Audio Only |
| Script on screen while you record | Not in Apple's steps | Yes, typed into the recorder |
| Pictures when you have no footage | You place every clip by hand | B-roll from your collections, timed to the narration |
| Captions from the narration | Not listed on its App Store page | Yes: on-device on Free (3 videos a month), AI in 60+ languages on Pro (50 min a month) and Max (200) |
| Pauses removed | By splitting clips by hand | Cut automatically, each cut toggleable |
| Price | Free | Free to start; Free exports above 720p carry a watermark |
Short version: if you already filmed the footage and want to talk over it, iMovie is free and does the job. If the voice is the video and the pictures are support, an editor that builds the visuals from your narration saves the slowest part.
A worked example: a 12-second voice-over, start to finish
For our App Store preview we recorded a 12.1-second voice-over in Wavcut's Audio Only mode, read from a three-sentence script about a morning routine, with natural pauses between sentences. No camera footage at all. This is what the auto-edit reported:
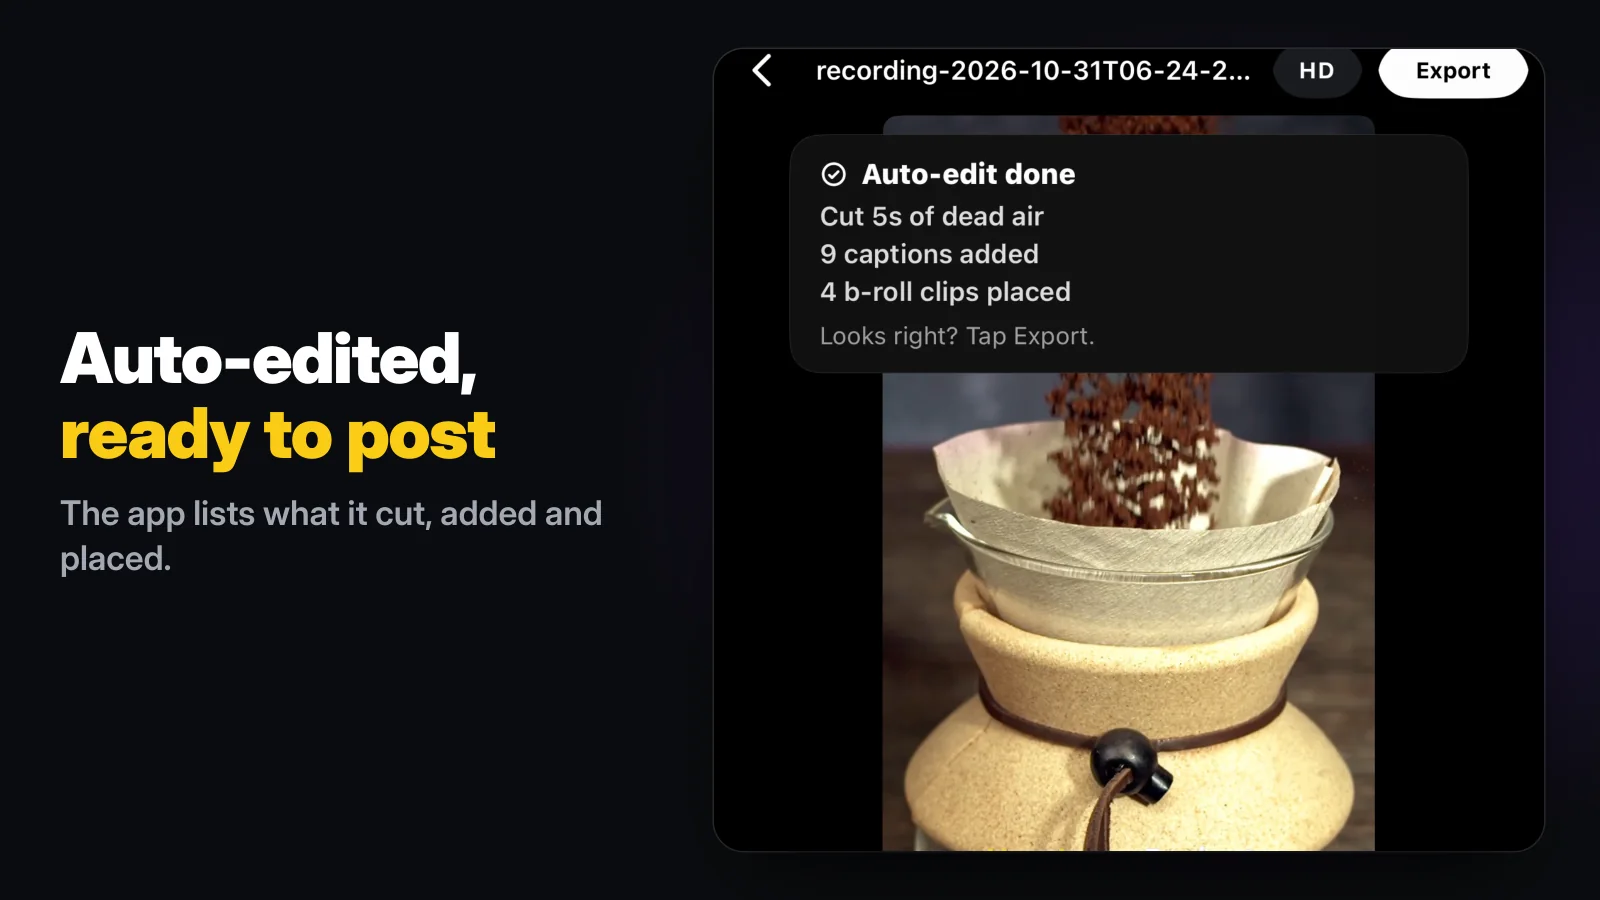
About 5 seconds of dead air came out, which left a take of roughly 7.5 seconds. Nine captions were added from the transcript, and four b-roll clips from our sample collections covered the picture. What is left for you is a check: read the captions once for misheard words and swap any cutaway that does not fit the line.
Doing the same in iMovie means recording the narration, placing four clips under it one by one, splitting out each pause and adding text for every line yourself. Neither route is wrong. The difference is who does the repetitive part.
How do I record a voice-over that sounds clean?
The room you record in matters more than people expect. A few habits help on any app:
- Record in a small room with soft things in it, such as a bedroom with curtains, rather than a bare kitchen. Hard walls add echo.
- Keep the phone at the same distance for the whole take, so your level does not jump between sentences.
- Write the script first and read it out loud once before you record. Lines that look fine on paper often trip you up when spoken.
- Listen back before you keep a take. In iMovie that is Review; in Wavcut, play the timeline before you export.
Pauses you leave while finding your place are fine in Wavcut, since silence removal cuts them, and auto captions make the video readable with the sound off.
The limits, so you can decide before you install: Wavcut is iPhone-only for now and has no speed control. On Free, 720p exports are clean; higher resolutions carry a watermark until you upgrade. On Pro and Max, only the audio is sent for AI captions; the video and the render stay on the phone. If you are weighing it against CapCut, our Wavcut vs CapCut comparison goes feature by feature.